
 Electronics are much more complicated than they used to be. They used to only contain a few wires, resistors, and circuit boards. Today, there are thousands of components to your electronic equipment.
That’s why the cost of electronics repair is higher than ever. A good repair person can cost up to $100 per hour to repair your device. If you want to save some cash, learning to repair your equipment yourself is worth trying.
If you have electronics that aren’t working and are thinking of repairing them yourself, this post will help you get started. Below are six tips that will help you learn how to start with electronic repairs.
1. Learn the Basics
There’s no better time than now to learn how to repair your electronics. In the past, you needed to head to in-person classes or learn from complicated books to figure things out. Today, you have the convenience of the internet.
Look for beginner electronics videos on the internet to learn the basics of electronics. You’ll need to know this if you want to understand what you’re looking at when you open up your devices.
If you want something more structured than random videos, there are many electronics courses available online. Sign up for one of them to learn step-by-step what you need to know.
2. Understand the Device You’re Working With
While knowing the basics is essential to fixing electronic devices, it isn’t enough to repair a lot of your equipment. Modern electronic devices are complicated, so it will be hard to understand what you’re looking at without any other knowledge. Luckily, you can likely find everything about your device online.
To start, look for schematics of the device you’re working with. These drawings will give you an overview of how the electronics of your device work. You can use this information to look for common failure points for your device.
You can also search for tutorials for repairing your equipment online. Other people have likely experienced the same issues you’re having with your electronics. If a blog post or video can walk you through common fixes, you’ll have your electronics repaired in no-time.
3. Buy Compatible Components
Repairing electronics isn’t a plug-and-play process. Many components go into your equipment. If you buy replacement parts that aren’t compatible, you run the risk of permanently killing your equipment.
Take a resistor, for instance. There are many different types of resistors that reduce the current flow on a circuit board. If you buy a resistor that doesn’t reduce current enough, it will damage other parts of your device.
The same is true for other electronic components. Make sure you have a good grasp of your device and the functions of your replacement parts. Triple check everything before you start replacing your parts.
4. Learn Common Electronic Issues
Even though there is a lot of information on the internet, you might not always be able to find what you need to figure out your issue. In these cases, you’ll need to do some investigating yourself.
It pays to know common electronic issues for situations like this. These issues include power disruption, bad capacitors, and bad resistors. Learn how to spot signs of these issues and learn how to find them on circuit boards.
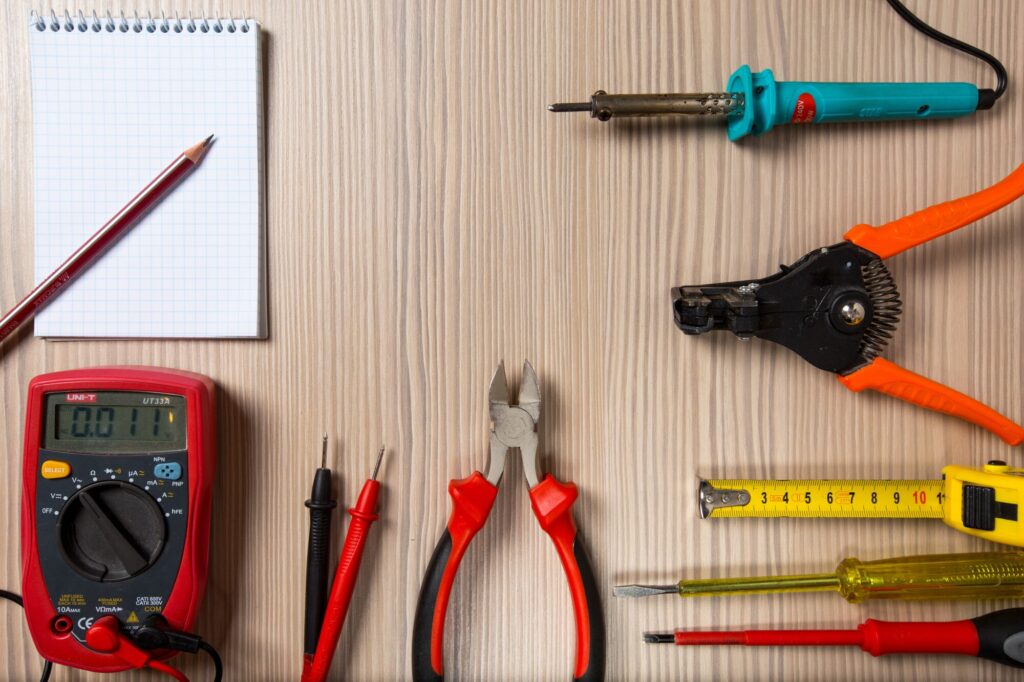
You’ll need a few tools for this phase of the process. If you’re looking for power problems, you’ll need a multimeter.
This device allows you to measure current throughout your device. You can use it to find spots with no voltage, which indicates that part of your device isn’t getting power.
A resistor, on the other hand, can visibly show signs of damage. If the colored bands around it are blackened, excess current may have traveled through it and damaged it. You’ll need to remove it and test it with your multimeter to determine if it’s still good.
5. Learn to Ground Yourself
You have to be careful when working with electronics. When you have a piece of hardware open, you put it at risk of taking damage. Unfortunately, a primary source of failure comes from you.
If you don’t ground yourself when working on your equipment, you can discharge electricity into your device. When this happens, your devices will be damaged even further.
If you want to stop this, you’ll need to ground yourself. Luckily, you can easily accomplish this with a grounding bracelet.
Your grounding bracelet attaches to your wrist or ankle. Once it’s connected, hook the other side onto a metal surface that isn’t painted. This will help stop static electricity from discharging from your body and damaging your equipment.
6. Get a Soldering Kit
You can’t fix many electronic problems yourself without the right equipment. While you can use multimeters and other measurement tools to help diagnose problems, you still need something to help you fix faulty connections. That’s where soldering comes into play.
A hand soldering kit will provide you the tools necessary to fix electronic components that have bad connections. Hand soldering tools allow you to connect electronic components by using solder to fill in the places that wiring is bad. These connections will allow current to pass through, so your electronic devices can do their jobs.
It isn’t too difficult to learn how to solder, but it’s still worth finding hand soldering training to make sure you’re aware of best practices. A few hours of training, and you’ll be ready for your first soldering project.
It Takes Time to Learn Electronic Repairs
Not everyone has the money to send all their electronics into repair shops when they break. It makes much more sense to learn about electronic repairs yourself and get your hands dirty. Use the tips above to get started on your journey to learning how to fix things yourself.
If you found this post useful, head back to our blog. Our articles have more great tips that you can use in your everyday life.